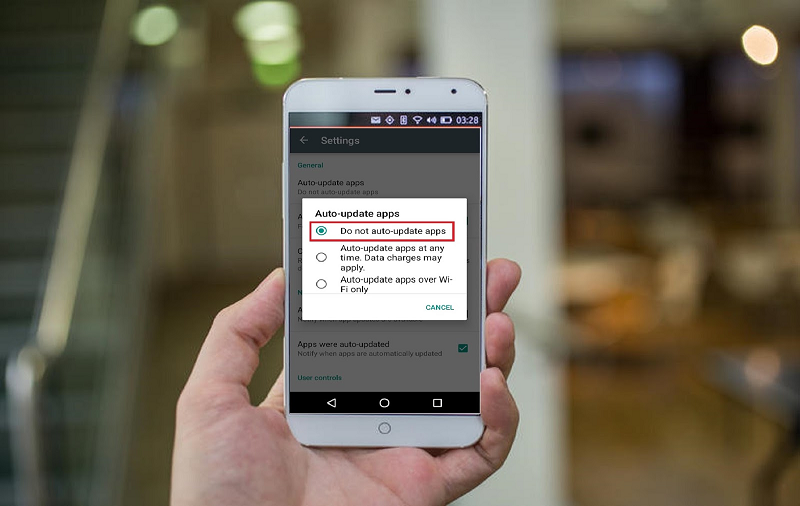
Here, I explain to enable or Disable Auto Update Android Apps and also you can control your Android auto updates apps in Google Play and also control it with a global setting or a setting for individual apps and see below Steps for enabling and disable Auto Update for Android apps.
How to Enable or Disable Auto Update Android Apps
Step 1: Open the Play Store app.
Step 2: Press the Menu button located at the upper-left corner.
Step 3: Select Settings.
Step 4: Select Auto-update apps.
Step 5: Choose do not auto-update apps.
Step 6: After Some devices option to update on Wi-Fi only as well.
Step 7: Done.
Setting for Individual App
Here, set the auto-update setting for individual apps to follow Steps.
Step 1: Open the Google Play app.
Step 2: Press the Menu button located at the upper-left corner.
Step 3: Choose My apps.
Step 4: Select the app you wish to modify.
Step 5: Press the Menu button located at the upper-right corner of the screen.
Step 6: Check or uncheck the Auto-update selection.
Step 7: Now you are complete control of when your Android apps get updated.
Step 8: After you can visit a list of installed apps on Google Play.
Step 9: Done.
Using Samsung Devices
Here, use of Samsung Galaxy device like Note8 and here some app updating may be controlled by Samsung Apps see below Steps.
Step 1: Open Home screen to slide up your apps.
Step 2: Open the Samsung folder.
Step 3: After then open Galaxy Apps.
Step 4: Select at the upper-right corner of the screen.
Step 5: Choose Settings.
Step 6: Select Auto-update apps.
Step 7: Done.
Here, competed for a guide for How to Enable or Disable Auto Update Android Apps and you read this guide very helpful for you.


 Online casino